Saturday, December 24, 2016
Soapy
The article by Reed Hansuld in Canadian Woodworking was a good reference. Soap flakes, water and a mixer borrowed from the kitchen is all that's required. The benefits of soap finish: it's likely the most environmental finish available; and it doesn't yellow the wood over time like an oil finish.
My soap froth was a little more concentrated than Reed's. I threw a couple handfuls of flakes into about a 1/4" of water, Reed uses one handful. I came to a nice finish after 2 coats, Reed says he normally does four minimum. With the amount of sanding between coats and soap dust I was happy with two coats.
I sanded between each coat, 220 on the first, 320 on the second, then buffed all surfaces with a white 3m pad.
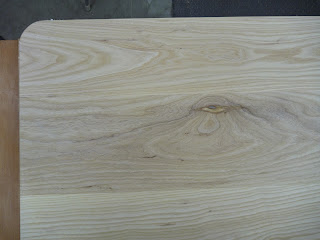
The table top after a couple coats:
Making table top clips:
All clips mortised and installed. The four outside visible clips were mortised to give a snug fit. For the others underneath the top, I sped things up with a pattern and template cutter on the plunge router.
Saturday, December 10, 2016
Desk Adventures; The Full Post-Mortem
Finding the rift sawn material in the plank:
Double mortises throughout:
Shaving down closer to final dimension, pre-glue-up. I've never had an edge try start an argument with Big Willy, my dad's record #7. 'Big Willy' because my dad's uncle Willy gave this behemoth to my dad when he started his boat building apprenticeship, love pulling it off the rack:
Pre glue-up clean up and joint fitting:
Always take a moment to savour the shavings in the bench room:
First apron/leg glue up using the bench vise. Yes, I've taken to using two part epoxy glue for some glue ups. Wish there was a less toxic solution for a longer open time. But as the glue ups become more complicated it's wonderful to have that extra time and the joints come together in a well lubricated fashion with very little pressure.
Second side, with a stretcher thrown in:
Post glue-up flushing the aprons with the top of the legs.
This is what we're aiming for:
Final glue-up (20 mortise and tenons) bring it all together:
Table top glue-up:
Flushing the rails with the aprons post glue-up:
Table top clean up:
Table top shaping:
Monday, November 7, 2016
Friday, November 4, 2016
No longer topless
Tops have been attached and final coat of oil applied.
Some ash made it's way into the shop. I'm planning a decent, inexpensive, hopefully straightforward but fun build, seven foot office desk. to replace my piece of crap ikea desk. enough is enough.
Friday, October 28, 2016
Friday, October 14, 2016
Wednesday, August 31, 2016
Back to School
There's been a little too much relaxation and recreation. We went too deep this summer. It's time to get my head back into shop space. The two month Africa sabbatical went something like this...
So with the rain returning to BC, and with the boy heading to school next week, it feels like the time is right for something. Here's the start of a small 4 unit production run of arrow end tables. A few shots while making up the main leg, and some of the parts after final milling.
Thursday, May 19, 2016
Subscribe to:
Comments (Atom)


