Monday, April 30, 2018
Back End
Here's the front end, waiting for the back end.
Glue-up time.
Big Will came out for the flushing and fitting.
Back-panels are a bit like underpants, you just never know...bit of a chore to make, but they need to look half decent. Here's one of a couple dry fits, in between some fine tuning up of the panel sizes and rabets.
Glue-up time.
Big Will came out for the flushing and fitting.
I didn't get carried away on a perfect fit, but the back-panel does offer some racking strength, so I aimed for a reasonable fit. Made up some aluminum swivel clips and a couple leather tabs to make the panel easy to take in and out, just in case.
Tuesday, April 10, 2018
Front End Continued
Drawer pulls are an exercise in patience. When all I wanted to do was mount those false fronts. But some fun was had in la-la land.
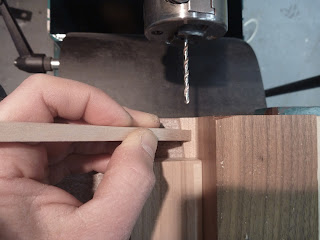
Hold it right there. my setup to keep tiny things still on the horizontal mortiser.
Shooting tiny tapers.
Glueing posts into tiny dadoes cut in the bars before pinning with 1/8 aluminum rod.
Not an option to drill a false front in the wrong place. Couldn't cut more Elm parts if I wanted to. There's nothing left. So I made a template/dowel jig for each drawer to drill the mortises for the pulls.
Rebel without a cause. He's sitting there waiting for his feet, and back panel and an ungodly amount of finishing. But the false fronts seem to finally be in place. I used shims for the reveals (made them a hair over 3/32) and double stick tape on the drawer box front to place the fronts. Then screwed them in place and used the Blum slider tilt and height adjustment to fine tune. Good thinking having these adjustments, unfortunately the height adjustments are all made of thin plastic, so most of them snapped off.
Hold it right there. my setup to keep tiny things still on the horizontal mortiser.
Shooting tiny tapers.
Glueing posts into tiny dadoes cut in the bars before pinning with 1/8 aluminum rod.
Subscribe to:
Comments (Atom)


